Receive notifications
about remodeling updates
send an e-mail
2003
Ohio Avenue Block Party
passwords required
-- send e-mail
E-mail
our alder,
Judy
Olson
Updated Jan. 3, 2004
Posted June 4, 2003
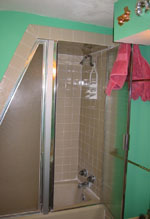
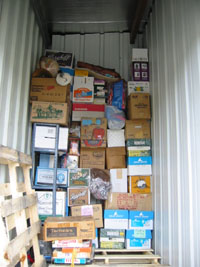
Preparation for demolition
The remodeling project has begun. The first step was moving around multitudinous miscellaneous items, from Jell-O art to family heirloooms.
|
With assistance from Judy (not shown), Karen moves Jim Hansen's Calder Jell-O, circa 2000, to its permanent installation over the stairs. |
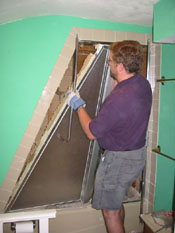
1. To save a little money, Karen decided to contract the work on the bathroom herself, and to handle the demolition. Judy saved the day by demonstrating proper, tile-breaking technique. Thanks to Bret for the loaned tools. |
|
After several carloads ... |
2. Thinking she had to drill out the screws holding the shower door together, Karen rushed off to the hardware store to buy a metal drill bit and a screw extractor. She didn't realize such finesse was not needed. Puzzled at the amount of time drilling a screw was taking, Karen called Brent, who loves demolition. |
|
Tilly starts to get used to dining in the living room. |
3. Turns out sheer force is the key to removing the door. Thanks Brent.
|
|
A little tense due to the June 4 demolition of the upstairs bathroom, Tilly paces the porch roof. |


|
What is the plan, man? Phase 1: Preparation leading up to demolition that began June 12 |
|||
| Phase 2: Down to the bones | |||
| Demolition June 12-16 |
Siding June 14-16 |
Excavation June 17 |
Waiting for
concrete June 18-?? |
Phase 3: Foundation work begins; inside shored up; toilet flushes |
|||
| Inside June 23-July 3 |
Outside June 23-July 3 |
Ah,
running water June 23-July 3 |
|
| Phase 4: Stairway to heaven is no flight of fancy | |||
| Basement
becomes accessible July 3-10 |
|||
| Phase 5: Framing, siding | |||
| Taking sides July 14-22 |
Framing analysis July 14-22 |
Lift
high the roofbeam, carpenters July 14-22 |
|
| Phase 6: Windows, doors, decks, electricity, deck joists, drywall | |||
| Exploring the
interior July 22-Aug. 13 |
Shower
is working August |
Plumbing the
depths July 22-Aug. 13 |
Dare to drywall Aug. 14 |